FAGO-DIY-35 Installation Guide

Check Gate and Pillar requirements before installation
1. Pillar size allowance

Prepare at least 157mm for bracket installation

You can have extra space

Make sure there are enough space to fit the motor bracket
2. Pillar skirting

If the bracket’s installation height are on the pillar’s skirting

You will need to remove certain part of the skirting

So that the bracket can be installed straight
3. Hinges

Descriptions

Descriptions

Descriptions
Tools needed for installation
All tools can be found at your home or purchase from your local hardware shop

Drill hammer

Screw gun

Spanner size (TBC)

Hammer

Spirit level tool

Measuring tape

Pencil for marking

Screw driver +-


Part 1 – Motor Driver Installation

1.1.1
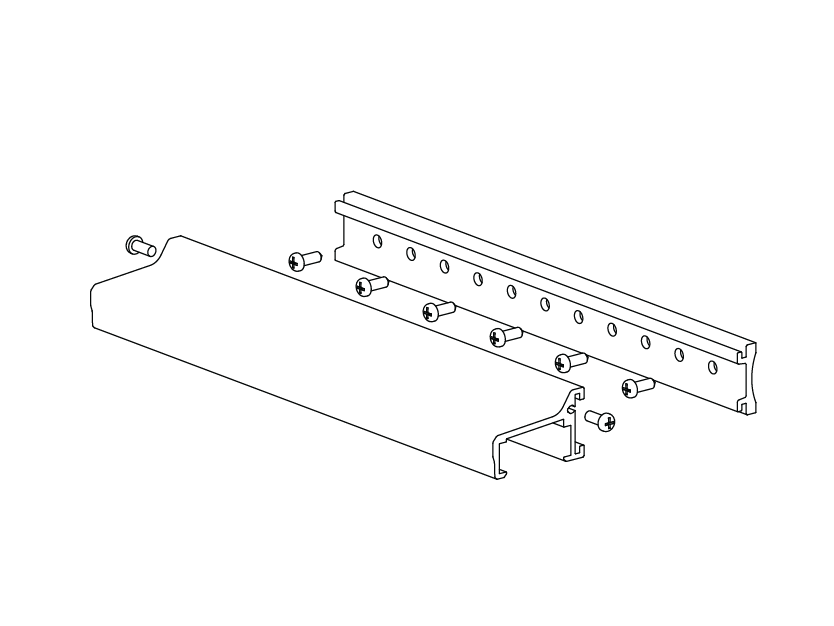
Put the c-channel with holes at the
gate pointing to the pillar and draw
an X on the point with a pencil
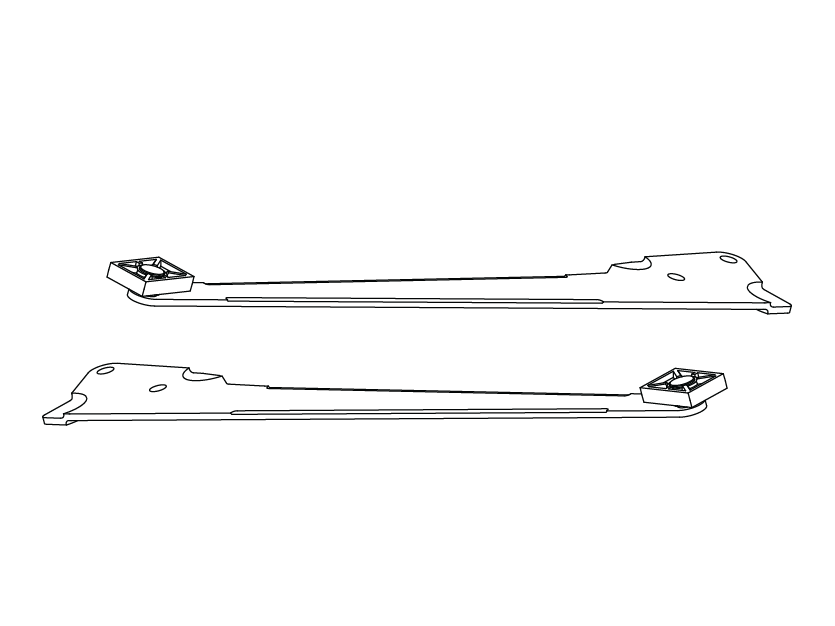
c-chanel (1010A)
1.1 Install the c-channel
Next swipe left
1.1.2
Use a measuring tape to measure
64.5cm from the pillar to the gate
and screw the c channel
Next swipe left
1.1 Install the c-channel
1.1.3
Slide the cover of c channel and
secure the c-channel by fastening
the c-channel screw with a
screwdriver
1.1 Install the c-channel
Next swipe left
1.2.1
Align the hole to the X mark and use
a spirit level tool to get parallel
level of the bracket then mark all
4 holes with pencil
Wall bracket (1005A)
1.2 Install the wall bracket
Next swipe left
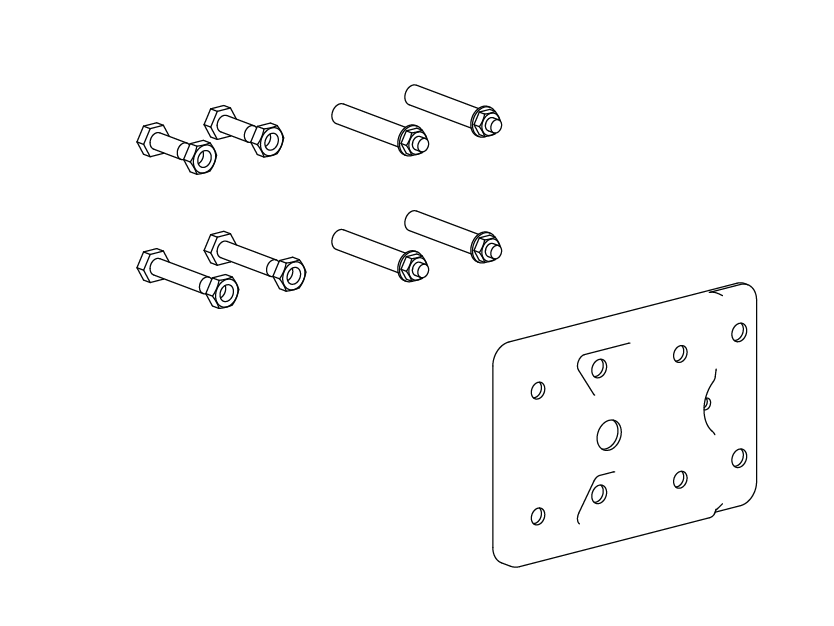
1.2.2
Drill 4 holes with drill hammer and
insert wall plug by carefully hammer
it in
1.2 Install the wall bracket
Next swipe left
1.2.3
Set up the wall bracket with screw nut motor,
Tighten the wall plug nut with spanner
1.2 Install the wall bracket
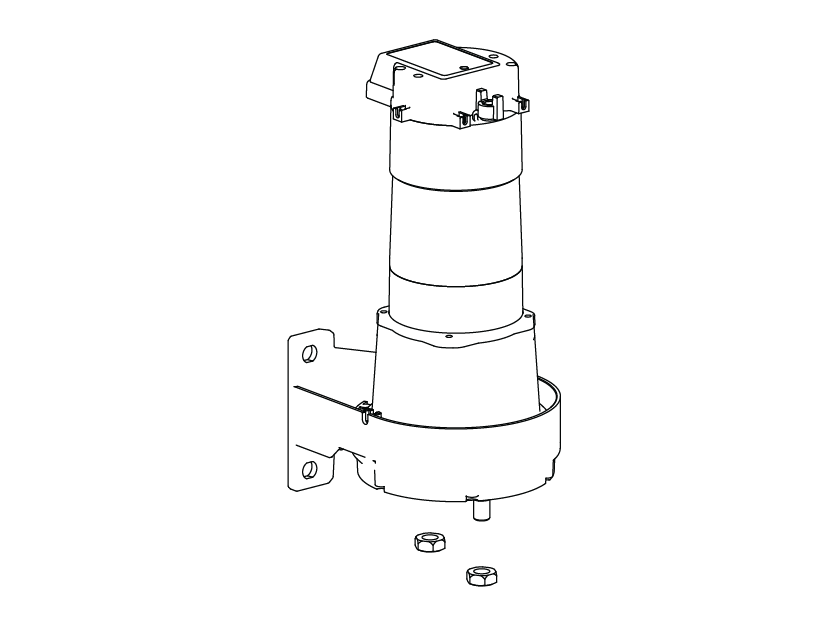
1.3.1
Unscrew motor housing and remove the housing
for later use
1.3 Install the motor
Next swipe left
1.3.2
Place the motor body in and screw
the nut tight with spanner, and insert
the motor stopper
Motor body (1002A)(1004A)
1.3 Install the motor
Next swipe left
1.3.3
Turn the lock to horizontal angle to
unlock the motor to manual
Driver bar (1008A)(1009A)
1.3 Install the motor
Next swipe left

1.3.4
Insert the driver to the c channel and
the motor, then tighten the drive bar
nut with spanner
1.3 Install the motor
1.4.1
Adjust the long nut size for the opening
position through manually pushing the gate
1.4 Adjust the open and close position
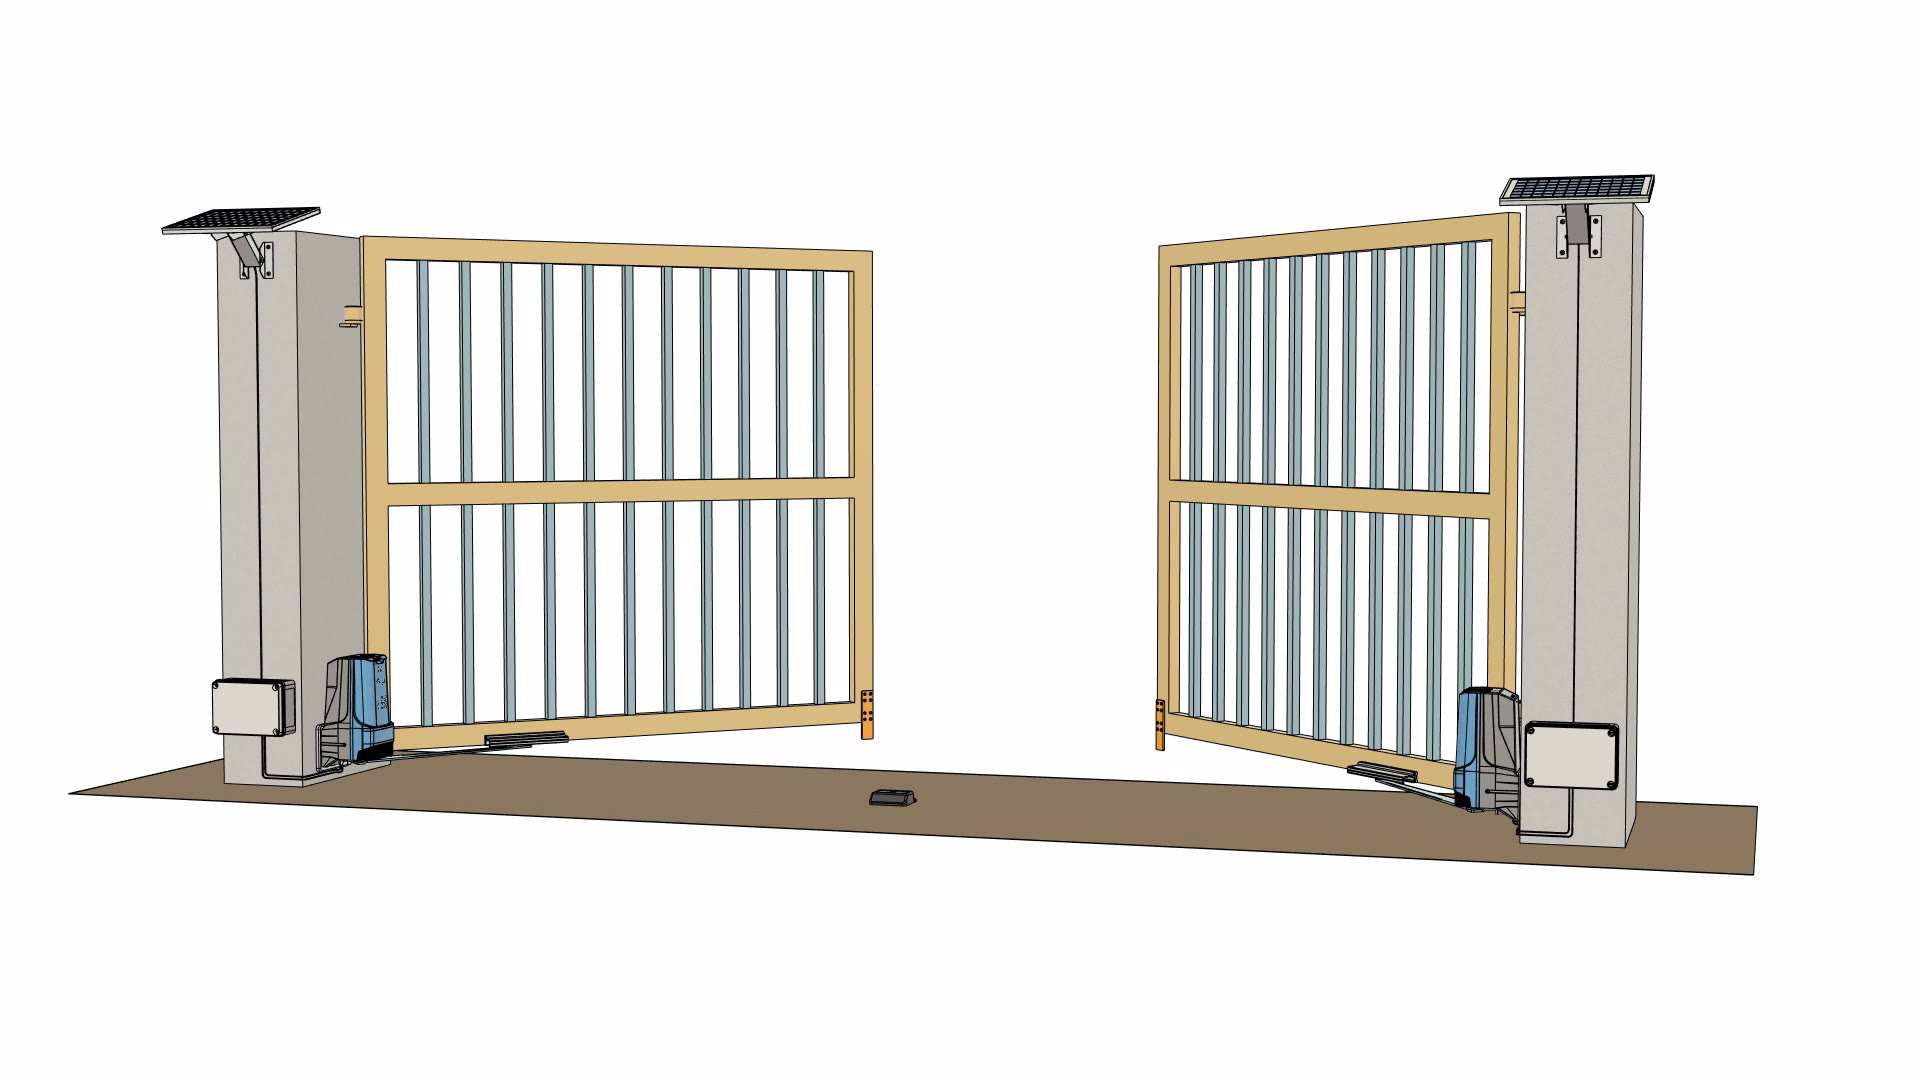
Part 2 – Powering System of your choice

Motor wiring descriptions
Overview
Next swipe left
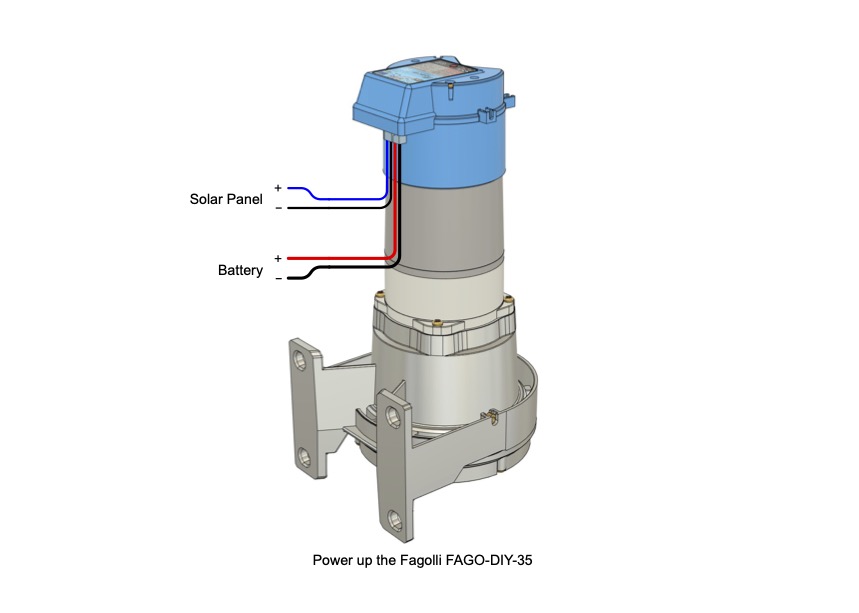
No underground wiring needed
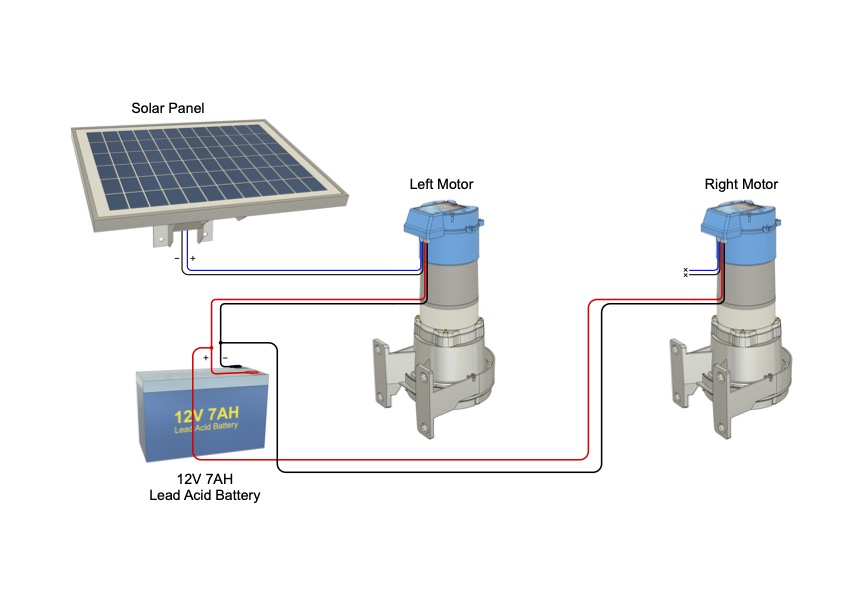
Option 1 - Default Solar individual powering system
Next swipe left
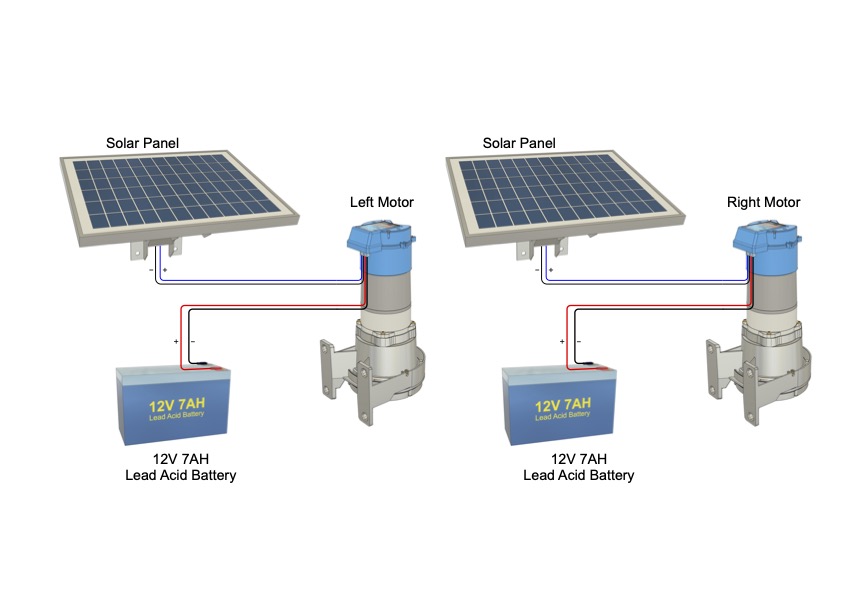
Powered by solar panel with battery
and underground wiring
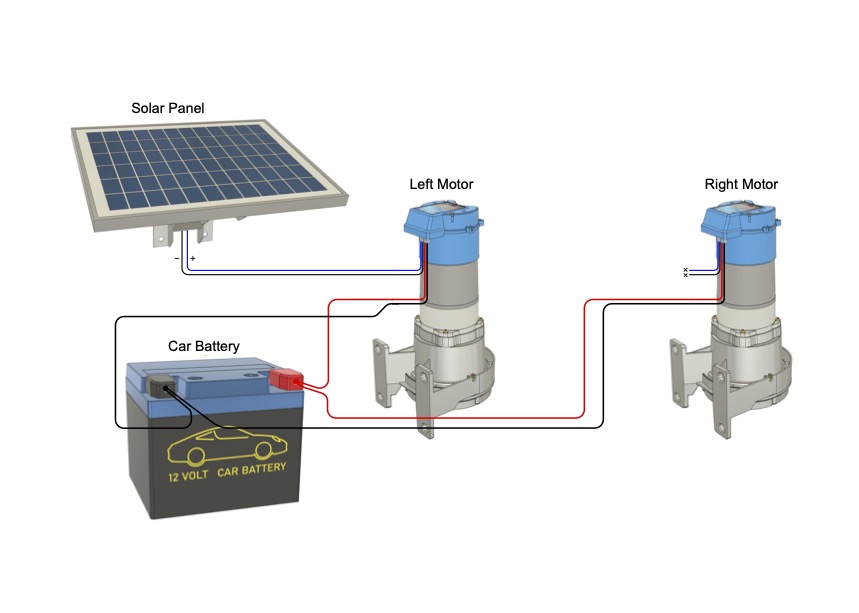
Option 2 - Single solar panel powering system
Next swipe left
Powered by solar panel with car battery and
underground wiring
Option 3 - Single solar panel powering system
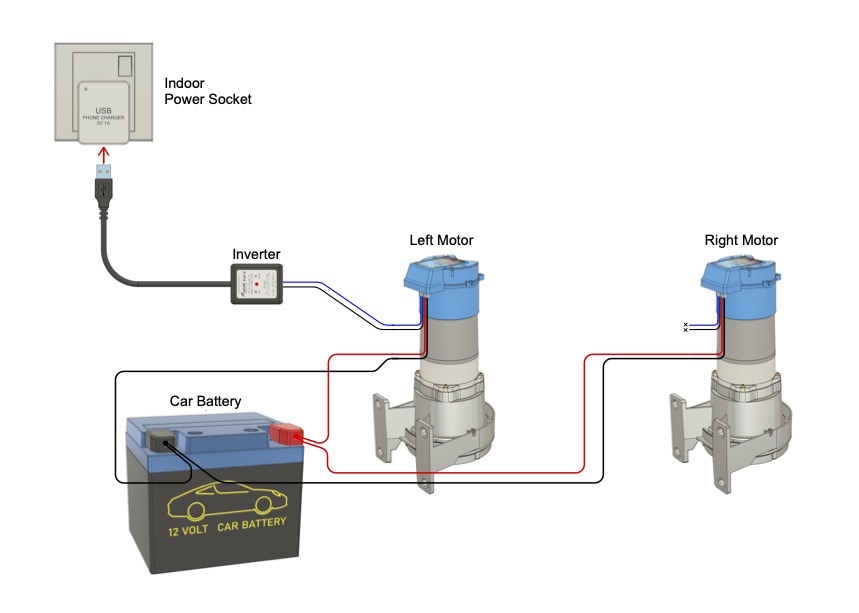
Next swipe left
Powered by USB inverter and battery with
underground wiring
Option 4 - USB power inverter powering system
Part 3 – Set up remote controls

3.1.1
Manual close both gates
3.1 Paring remote
Next swipe left
3.1.2
Place one remote on top of the smart
motor , direction from inside your house
facing the gate, with the Left motor,
press and hold the left button until the
Left gate panel opens. Repeat the same
step for Right gate with the Right button.
3.1 Paring remote
Next swipe left
3.1.3
Operate the gate to check if functions
correctly for all remotes
3.1 Paring remote

3.1.1
remote button diagram
3.2 Remote button diagram
Part 4 – Finishing

4.1.1
Adjust the lock on the smart motor
to lock position as shown
4.1 Housing
Next swipe left
4.1.2
Place the housing and screw left and
right back with screwdriver
4.1 Housing